|
|
|
|
|
|
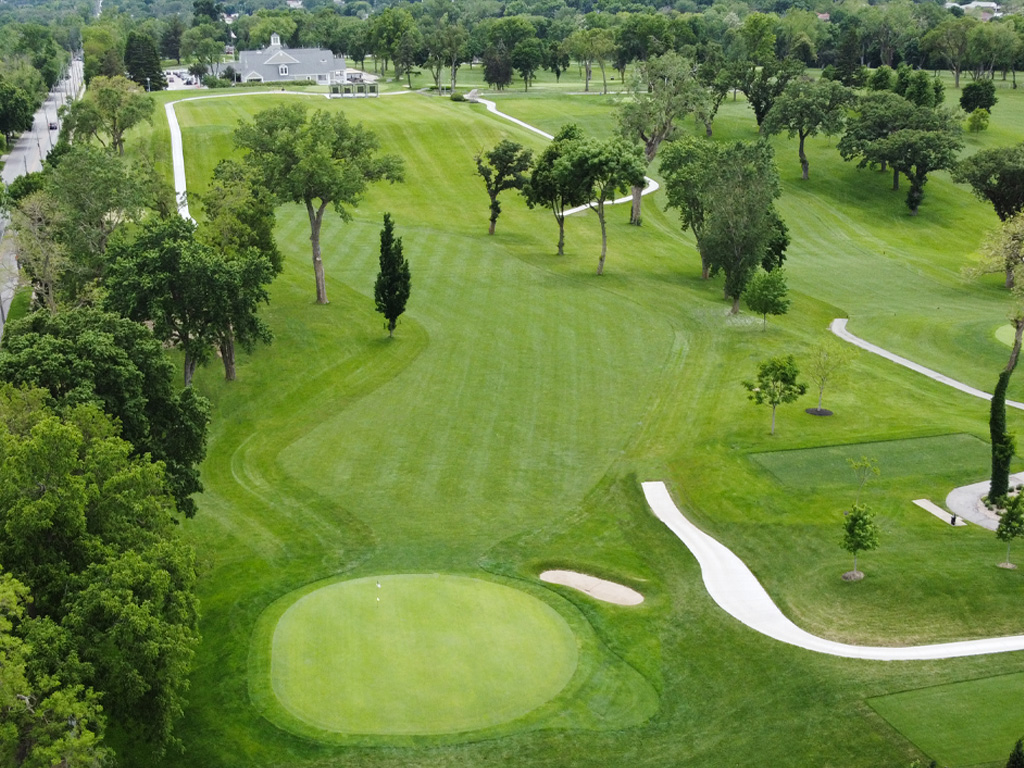
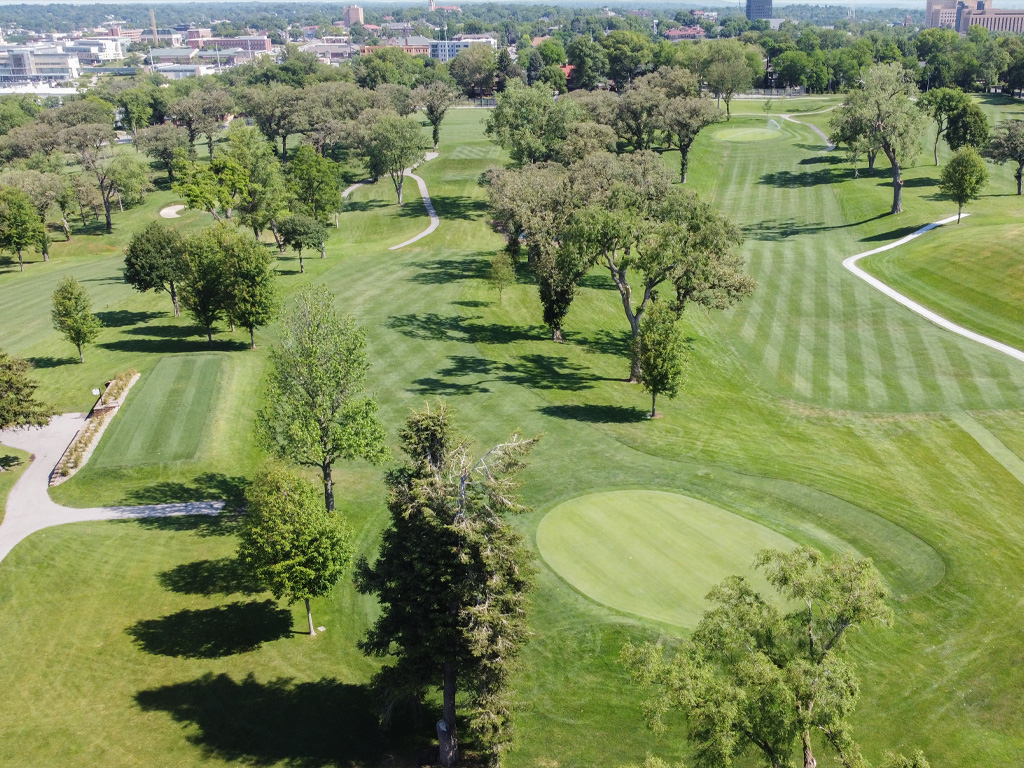
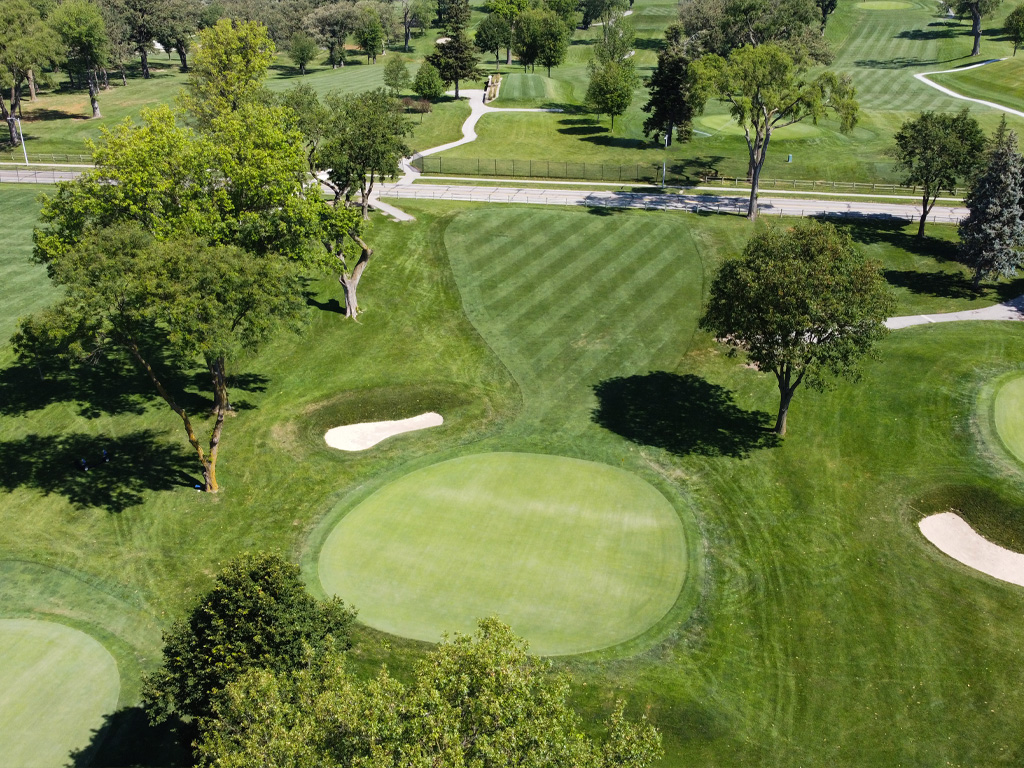
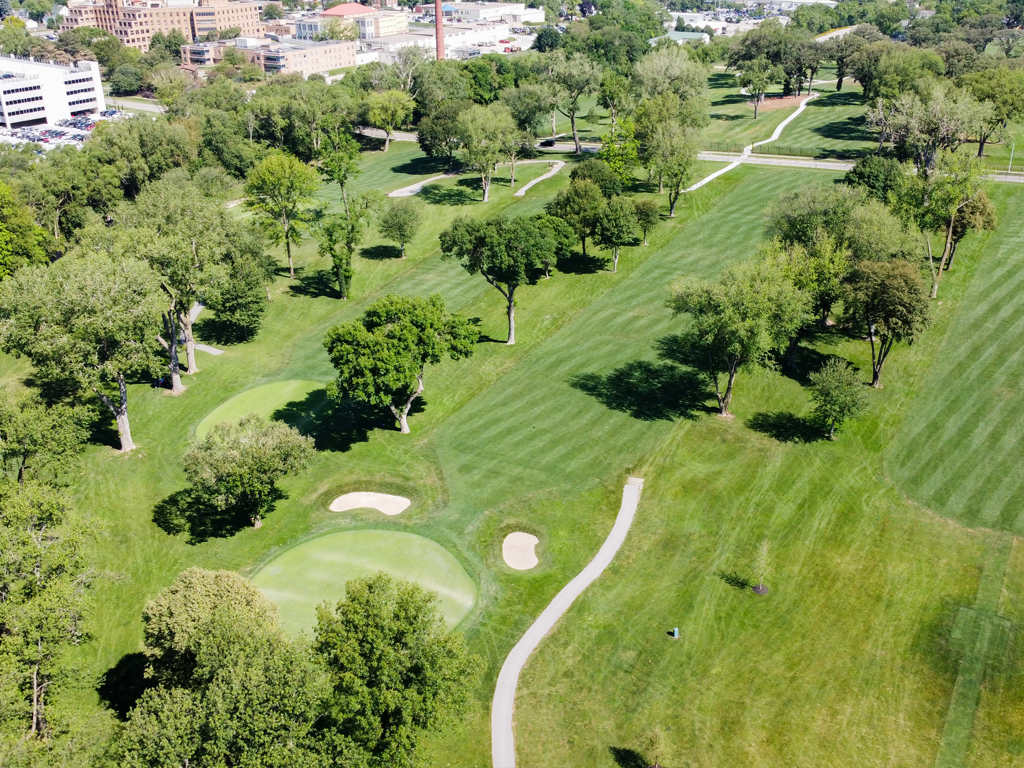
Hole #1 - This tough picturesque starting hole is the highest point on the course with a view of the midtown area. A long dog leg right where driving accuracy is a premium. A tee shot that leaks too far right can get you into trouble with the tree lined a fairway and result in a tricky punch out. A front left bunker and OB long and right requires an accurate second shot.
Pro Play: Play your tee shot up the left side to give yourself a chance on your second shot. Anything too far right will run you in to tree trouble. If you're going to miss the green, short and right is the spot to come in from.
| Yardage |
Black
367 |
Par: 4 |
Green
321 |
| Men: 11 |
Handicap |
Women: 7 |
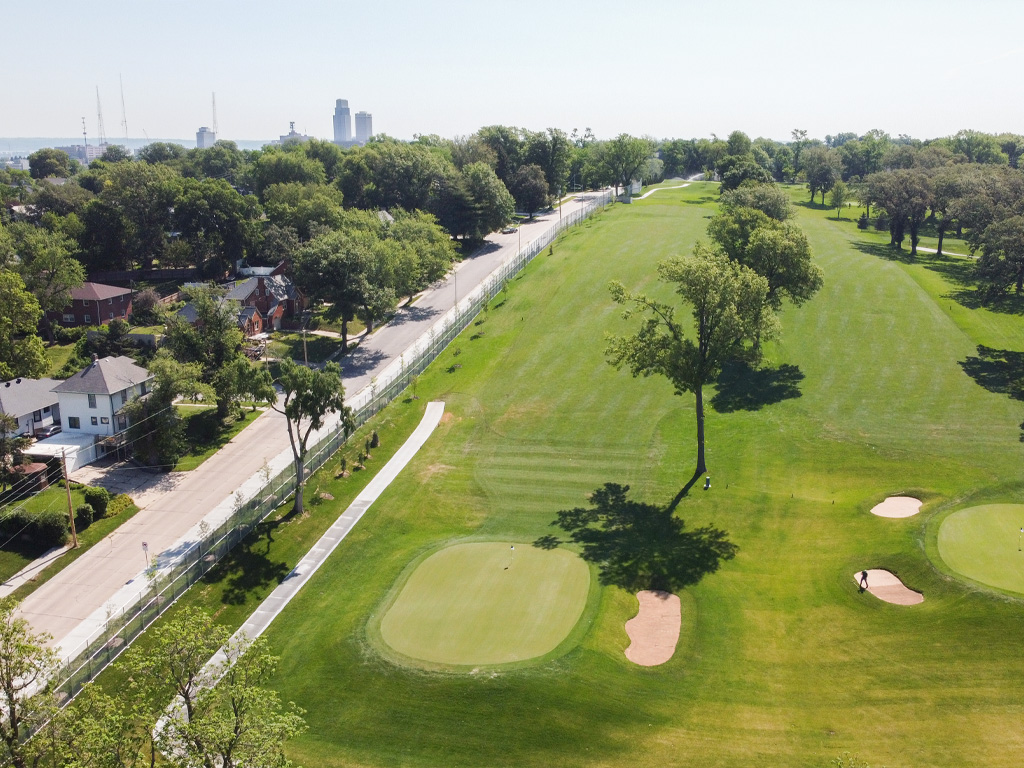
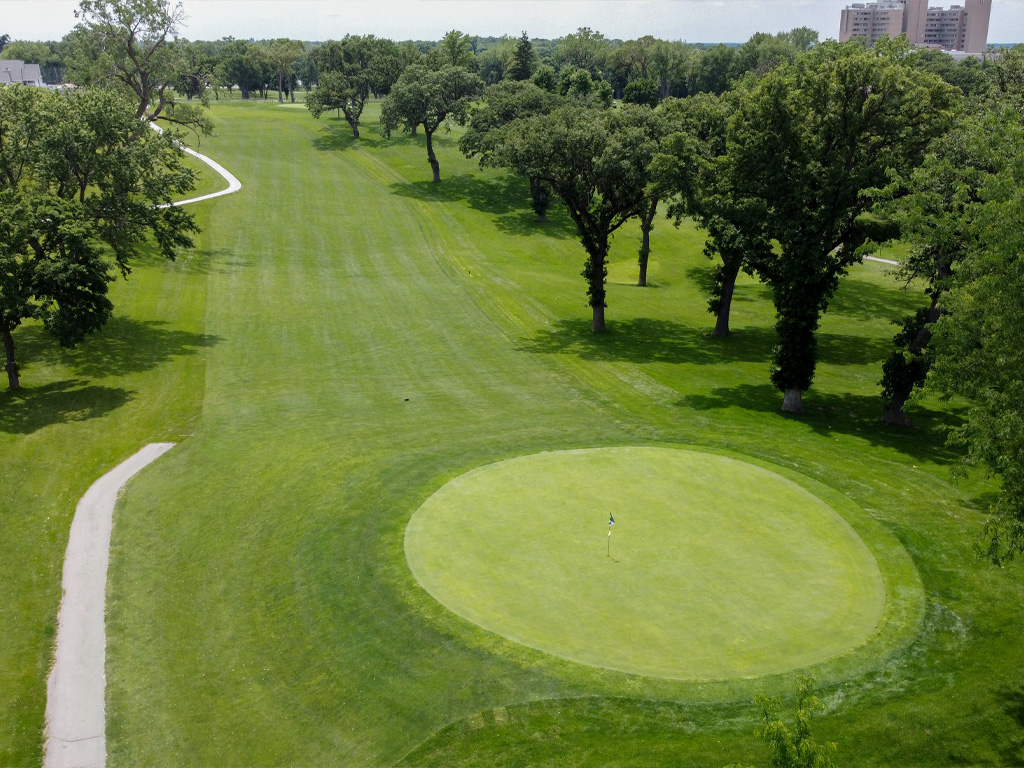
Hole #2 - After a tough starting hole, you now face the toughest tee shot on this course. Out of bounds directly to the right and trees on the left, there is nowhere to go but the fairway.
Pro Play: Aim at the cell tower with a small fade to place your ball in the middle of the fairway. This gives you an open shot to one of the biggest greens on the course.
| Yardage |
Black
420 |
Par: 4/5 |
Green
420 |
| Men: 1 |
Handicap |
Women: 11 |
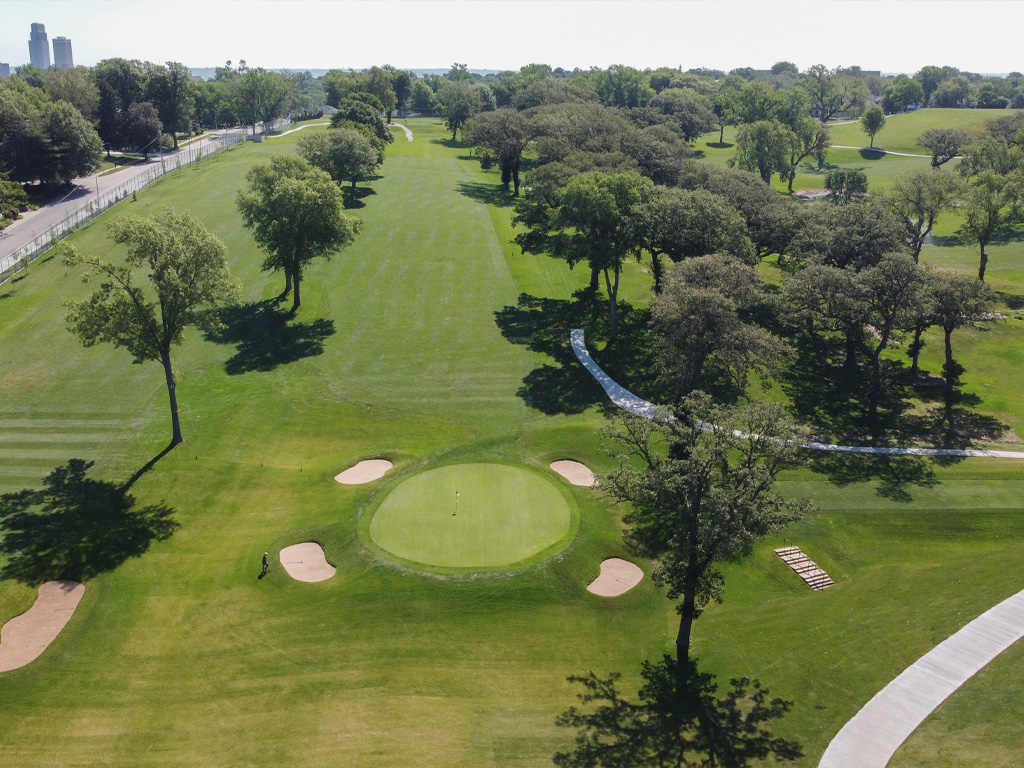
Hole #3 - The first of 2 Par 5’s on the course. A wide fairway protected on the left by trees and the right by out to bounds plays up-hill providing little or no roll. A long tee shot is required to get this green in two, the second shot plays blind as this is the first hole to cross Woolworth Ave. The green is bunkered to the right gathering errant approach shots.
Pro Play: If you plan on reaching in two you better bust a drive up the left side. Leave your drive too far to the right and you'll have tree trouble on your second shot. If you are feeling good, the 230 yard shot you have left will get you home, otherwise lay up short of the fence and play a wedge to green.
| Yardage |
Black
498 |
Par: 5 |
Green
463 |
| Men: 13 |
Handicap |
Women: 1 |
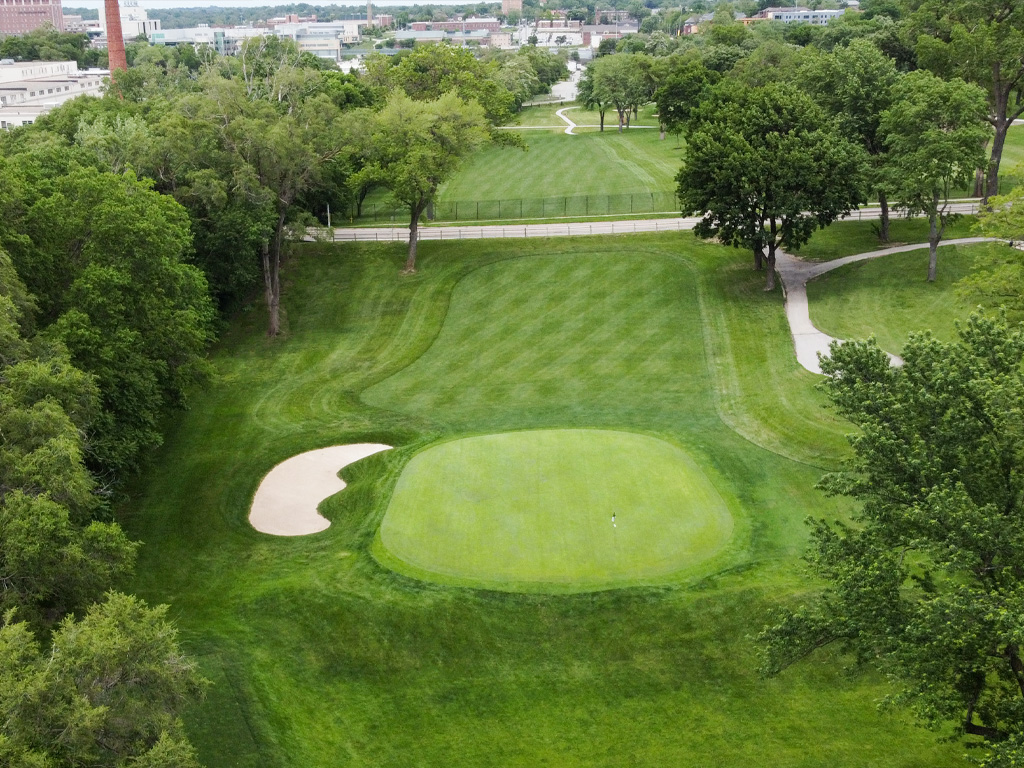
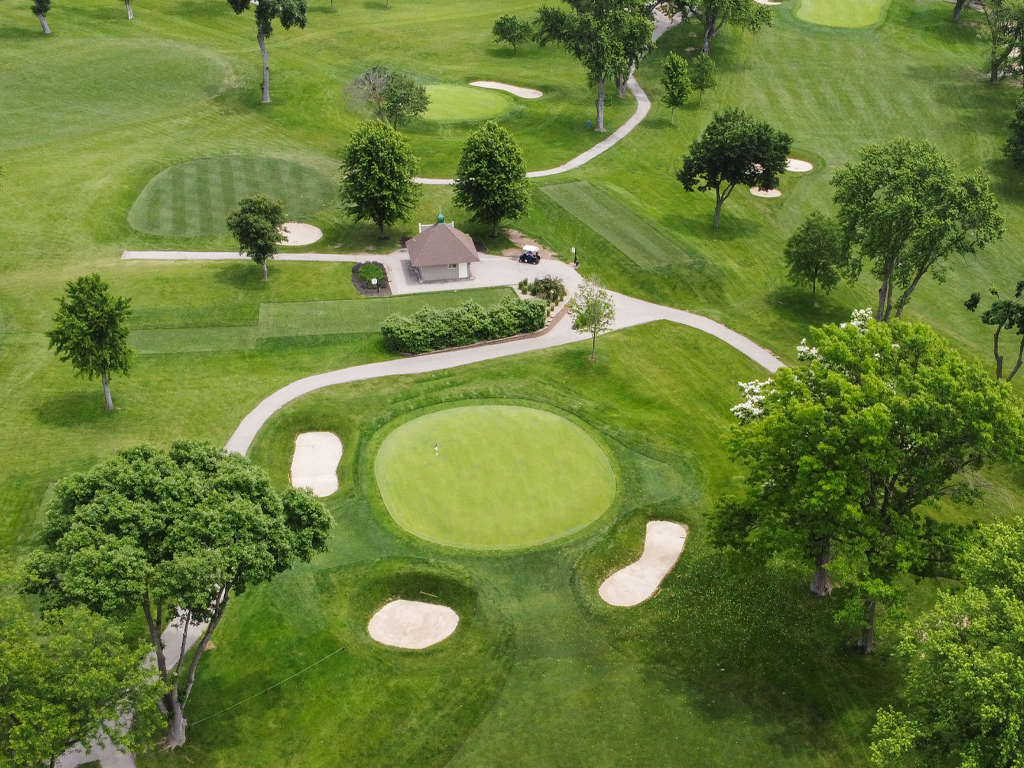
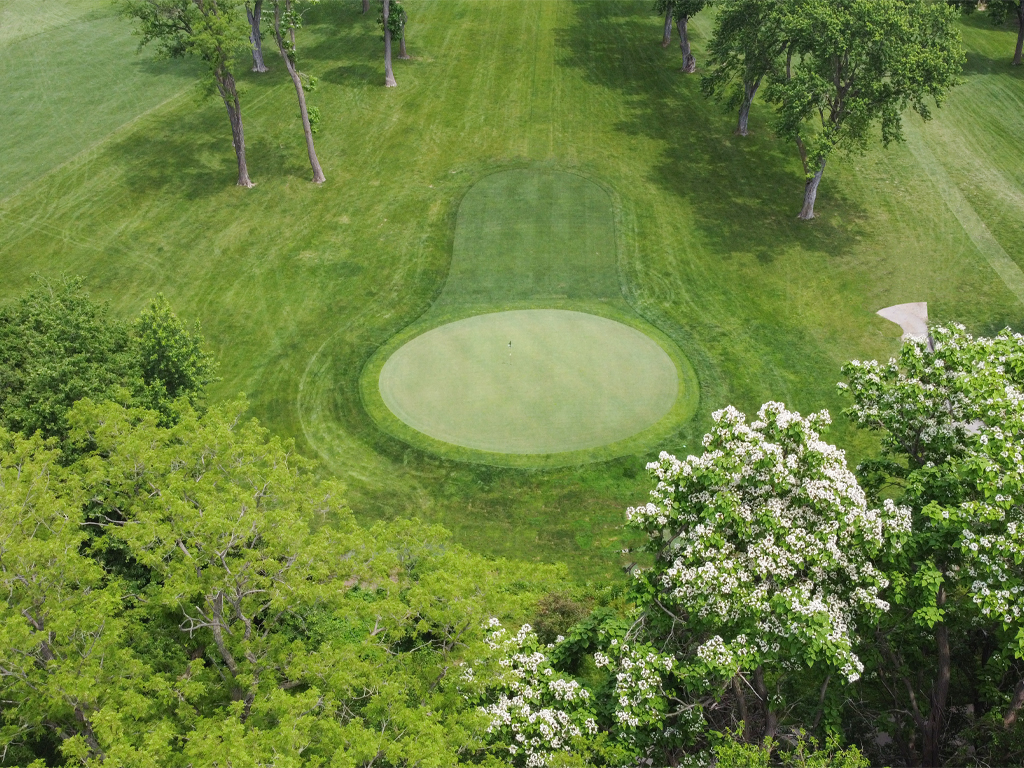
Hole #4 - This par 3 plays shorter than it looks with a green sloping hard left to right. There is no good place to miss here, a good hole with a tough green. Most likely you will need a good short game here to make par.
Pro Play: Play for your shot to land about 3-4 yards short. A good miss will leave your ball on the front right of the green. A ball that is coming in too hot will roll off the back and leave you with a tough up and down. Take your 3 and move on.
| Yardage |
Black
175 |
Par: 3 |
Green
171 |
| Men: 7 |
Handicap |
Women: 13 |
Hole #5 - This dog leg left can be a big risk or reward hole. One play is to rip driver over the dog leg and try to reach the green, be aware of the green side bunkers that surround this hole. The other play is a long iron or fairway metal to about 110 yards out and play for the green from there. Take an extra club to avoid the sand in front of the green as the second shot plays up hill.
Pro Play: Cut the corner slightly with a 225 yard shot and leave yourself 100 out. Long is dead with this severely back to front sloped green.
| Yardage |
Black
344 |
Par 4 |
Green
318 |
| Men: 3 |
Handicap |
Women: 5 |
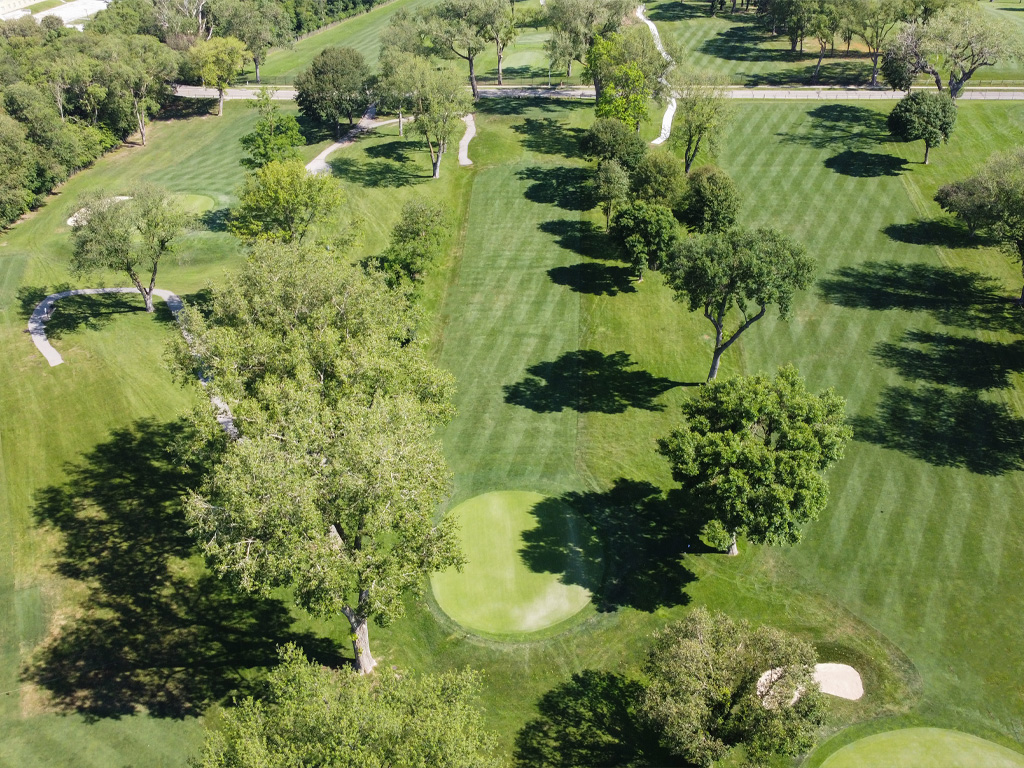
Hole #6 - One of the hardest par 3s in the state, this hole can play as long as 215 yards to a two tier green. A favorable front pin can leave an easy up and down if you miss short, while a difficult back pin gives you more green to work with on a missed tee shot. A giant slope in the middle of the green leaves for a great chance at a 3 putt.
Pro Play: Make your best swing of the day here, concentrate on a well placed shot either on the green or just short but in the middle front making an up and down attainable. Take a little more club as the hole plays about 5 yards uphill. Anything long of the green is a guaranteed bogey or worse.
| Yardage |
Black
182 |
Par 3 |
Green
159 |
| Men: 5 |
Handicap |
Women: 15 |
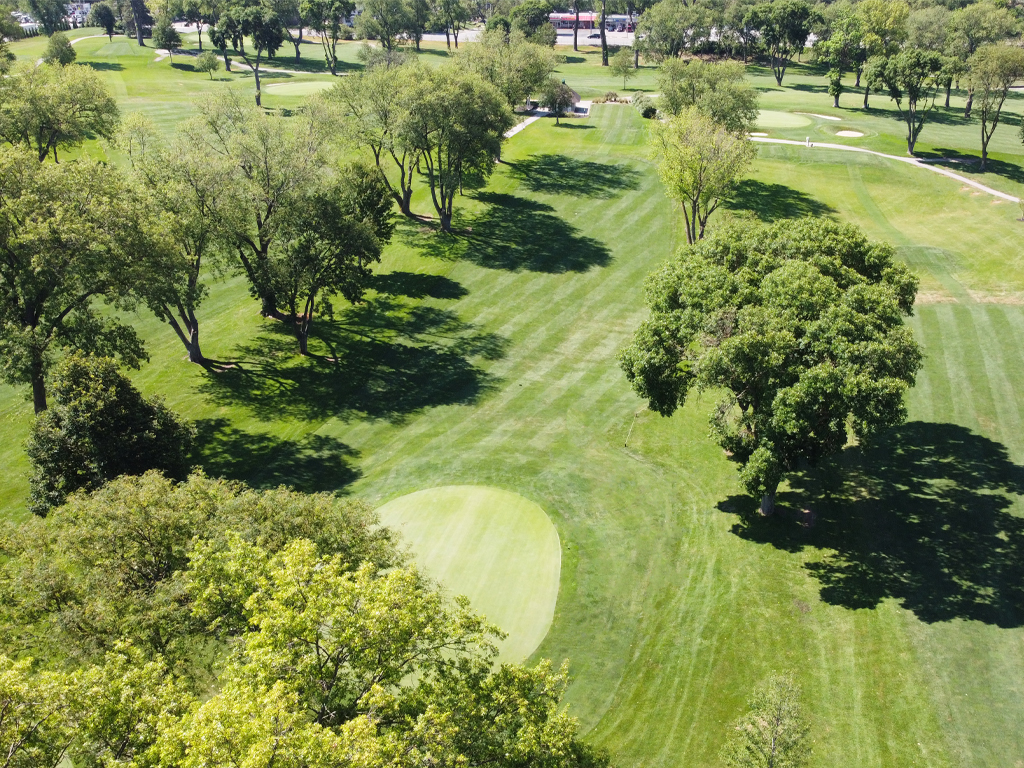
Hole #7 - The last par 5 on the course, the 7th hole is the longest on the course and requires you to once again cross over Woolworth Ave. With the help a south wind the longer drivers can occasionally cross the street with the drive. The second shot is important to keep as close to the center of the fairway as possible as it slopes down hill and to the left side. Miss too far left or right and the trees will gobble up your ball leaving a nearly impossible third shot. If hit far enough, the third shot may be from level enough ground to get close for a birdie putt.
Pro Play: This is a great hole to unload on the driver, as a wide open fairway is waiting. A very tough hole to reach in two but you can leave yourself in good position for a short wedge shot and a 1 putt.
| Yardage |
Black
545 |
Par 5 |
Green
477 |
| Men: 9 |
Handicap |
Women: 3 |
Hole #8 - Another risk and reward hole. This one requires not only an accurate drive but, also some distance. The narrow fairway is protected on both sides by trees with majority of the trouble coming from the left side. No bunkers and a fairly flat green leaves you a great shot at par or better.
Pro Play: Tee it high and let it fly. A long drive here takes most of the trouble out of play. Avoid the two grass bunkers on the left and right side of the green and you should have a great look at birdie.
| Yardage |
Black
295 |
Par 4 |
Green
259 |
| Men: 17 |
Handicap |
Women: 9 |
Hole #9 -You cross Woolworth Ave. for the 3rd time with your tee shot, but a raised tee box should give you plenty of room to clear the fence. A straight forward par 3 that has yielded several holes-in-one. Good Luck!
Pro Play: Play a 1/2 club less than you think as all shots bounce up to this green and long is jail. Aim for the center of the green and avoid the greenside bunker on the right.
| Yardage |
Black
175 |
Par 3 |
Green
159 |
| Men: 15 |
Handicap |
Women: 17 |
Hole #10 - This reachable Par 4, which plays downwind during the season, is just the type of risk reward hole that is so prevalent at the Field Club. A long straight tee shot may have you putting for eagle while an errant shot from the tee could have you 2 over par heading to the eleventh hole.
Pro Play: A long iron or fairway wood off the tee will leave you in position to play a wedge to the green for an easy par.
| Yardage |
Black
305 |
Par 4 |
Green
302 |
| Men: 18 |
Handicap |
Women: 6 |
Hole #11 - The tee shot is played from a group of trees that make this already narrow fairway even more visually intimidating. A tee shot of 200 yards will make the down slope of the fairway and carry your ball closer to the green. Be careful not to get too close, if the hole location is up front, it makes for an almost impossible birdie.
Pro Play: Pull out driver and swing away, the fairway opens up near the green and a well hit ball will leave you with a chip and putt for birdie.
| Yardage |
Black
344 |
Par 4 |
Green
308 |
| Men: 6 |
Handicap |
Women: 10 |
Hole #12 - This par 3 goes straight up the hill and will play long. Club up and play to the back of the green, the severe slope on the front half will have your ball rolling back to the front edge leaving a very long and tough 2 putt.
Pro Play: Take one extra club, if you can see your ball on the green from the tee box, you didn't hit it far enough.
| Yardage |
Black
150 |
Par: 3 |
Green
112 |
| Men: 10 |
Handicap |
Women: 18 |
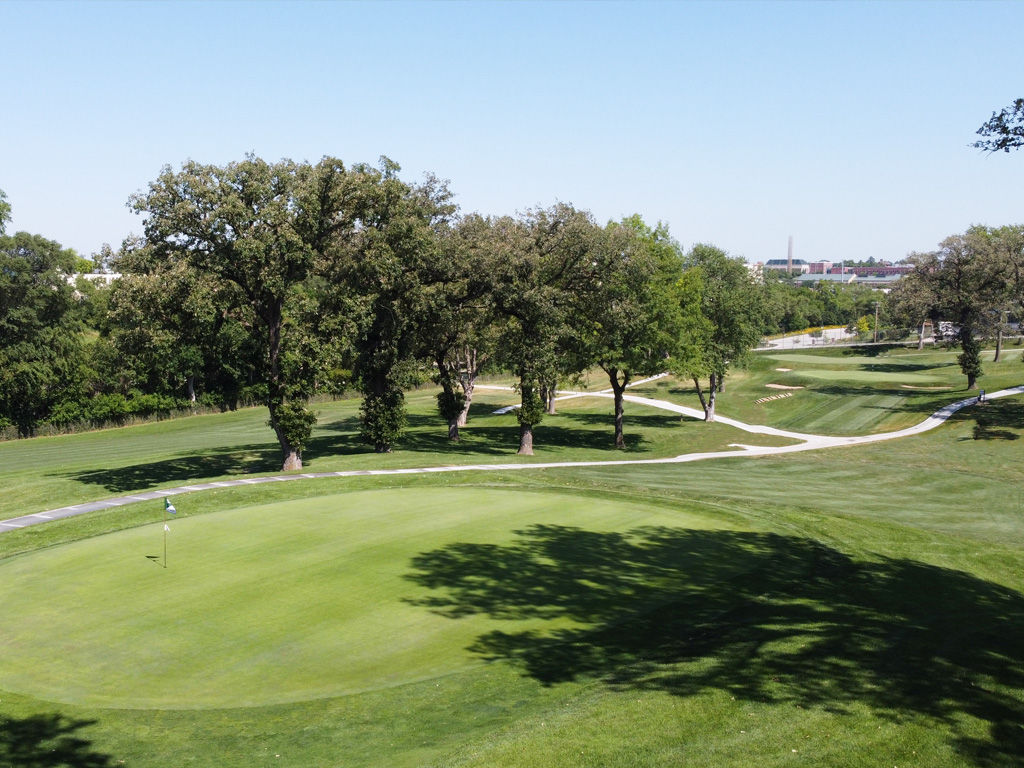
Hole #13 - A tough driving hole as you cross Woolworth Ave for the last time. A good drive will set you up to hit your approach to the correct portion of the green. An interesting green with 3 distinct mounds makes the approach tough as the mounds can feed your ball to or away from the pin.
Pro Play: There is more room than there appears to be, hit the driver off the tee and set yourself up for a short iron into the green. Pay attention to the pin placement when choosing how to hit your second shot.
| Yardage |
Black
342 |
Par: 4
|
Green
327 |
| Men: 4 |
Handicap |
Women: 4 |
Hole #14 - The start of the “Valley” this short down hill hole to a small flat green is just what the doctor ordered after the last 4 holes. Keep in mind out of bounds is behind the green and take one less club as most shots will bounce in front and roll on.
Pro Play: Grab a drink at the shack, place your wager on whether you can hit the green and play away, nothing fancy here and good shot will be rewarded.
| Yardage |
Black
181 |
Par: 3 |
Green
159 |
| Men: 16 |
Handicap |
Women: 14 |
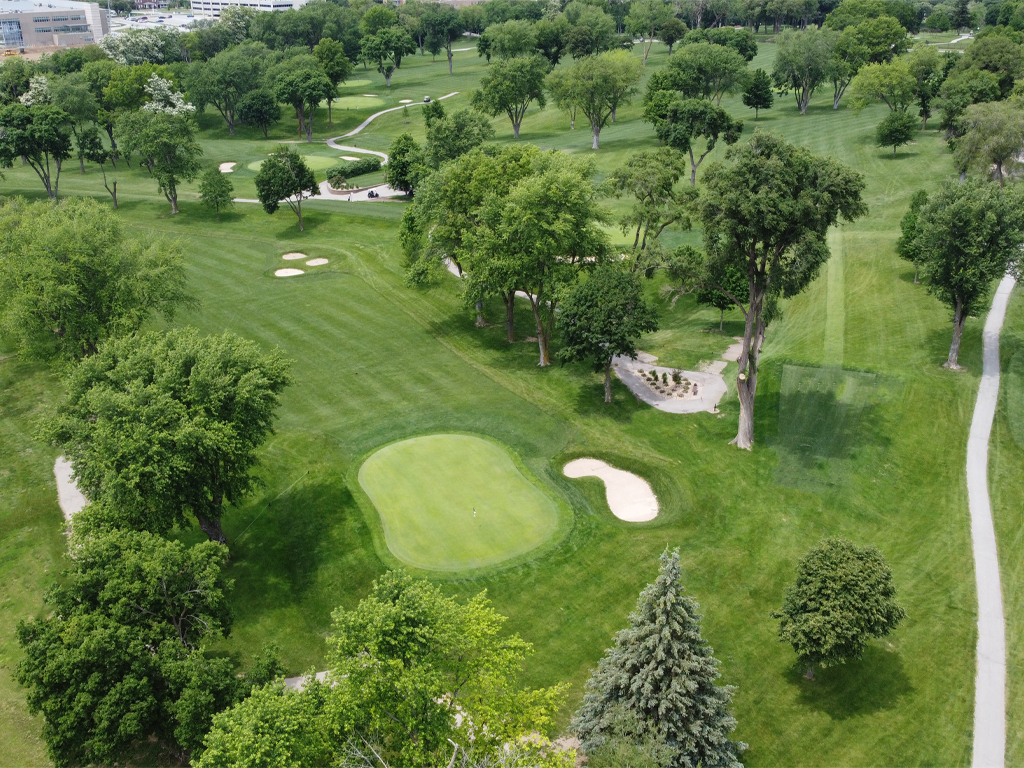
Hole #15 - A dog leg right around a group of 100 year old cottonwoods to the right and our only fairway bunkers on the left. A tee shot just short of the bunkers on the left will leave you with a great angle to the green at a distance around 100 yards. The green slopes severely back to front so be sure to leave your approach below the hole.
Pro Play: Most golfers play a fade, so take aim at the fairway bunkers with a driver and let that ball work its way back towards the fairway. That will leave a much shorter wedge into this green.
| Yardage |
Black
269 |
Par: 4 |
Green
249 |
| Men: 12 |
Handicap |
Women: 8 |
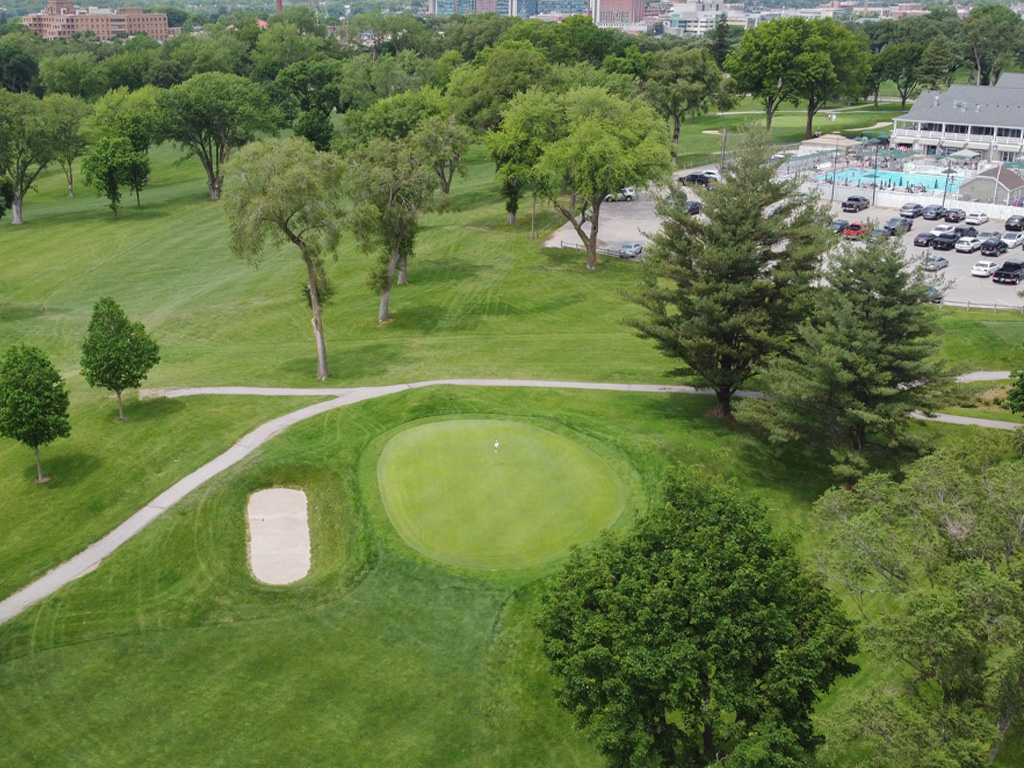
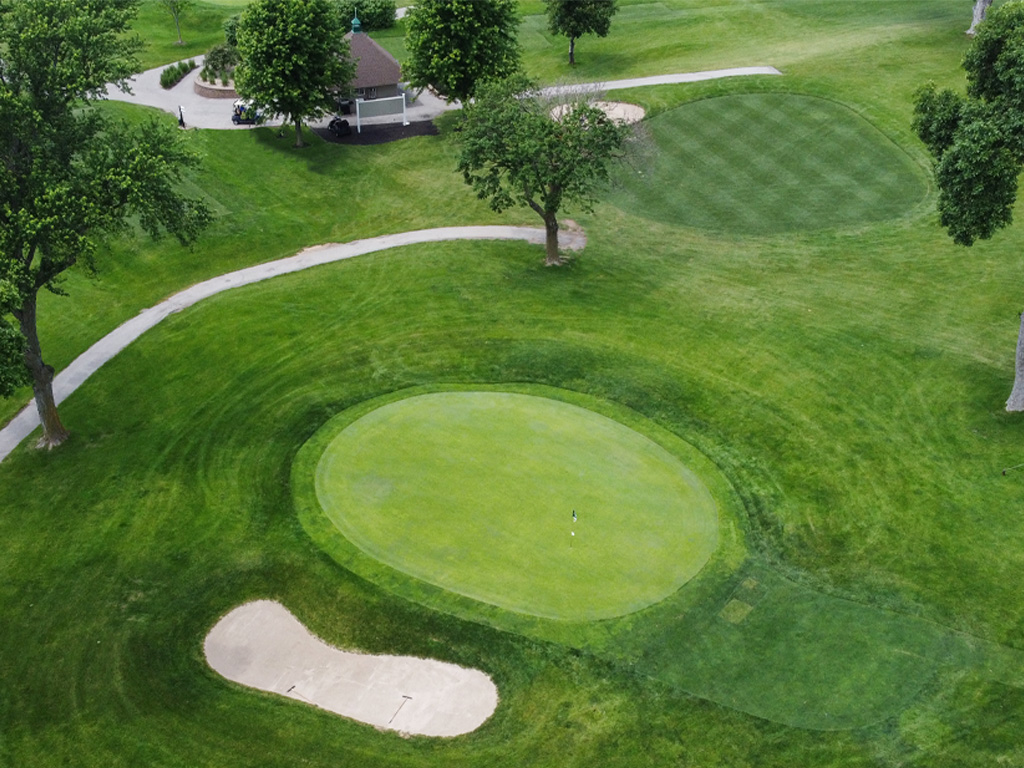
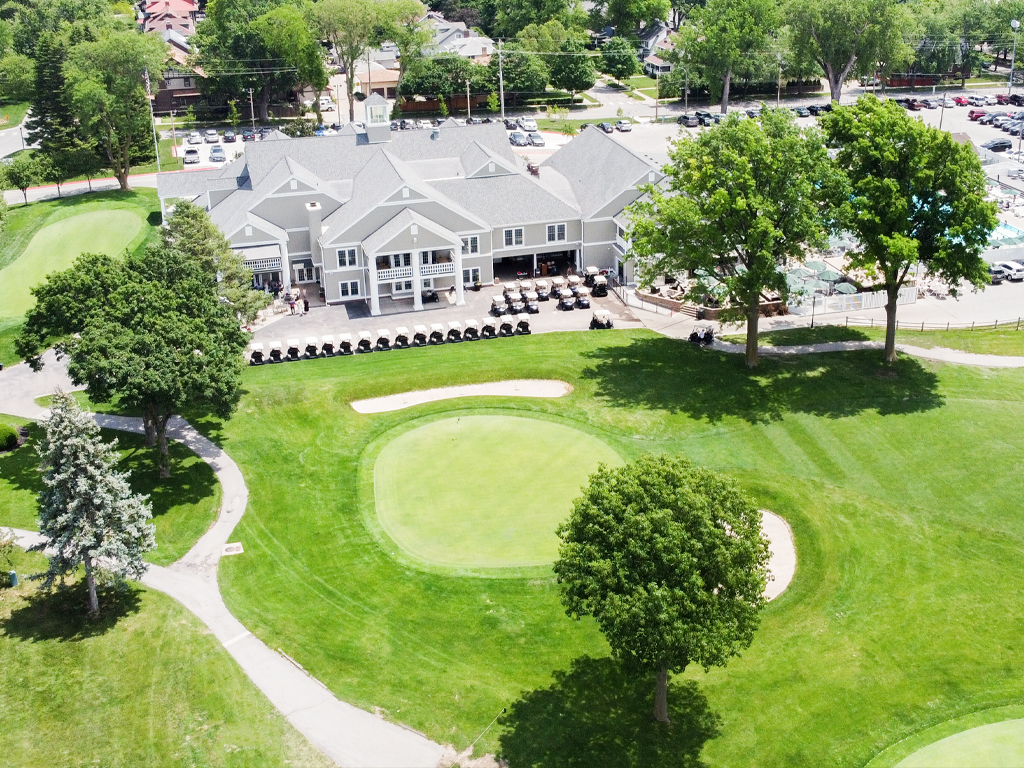
Hole #16 - A good hole here with a great view of the clubhouse. An uphill shot will require one extra club to get you to the green. Miss left and you find a deep bunker, miss right and down the hill you go, both will make par a tough task.
Pro Play: Take dead aim on this one and take an extra club. Another good birdie opportunity here. Hit it close and make your putt.
| Yardage |
Black
143 |
Par: 3 |
Green
131 |
Men: 8
|
Handicap |
Women: 12 |
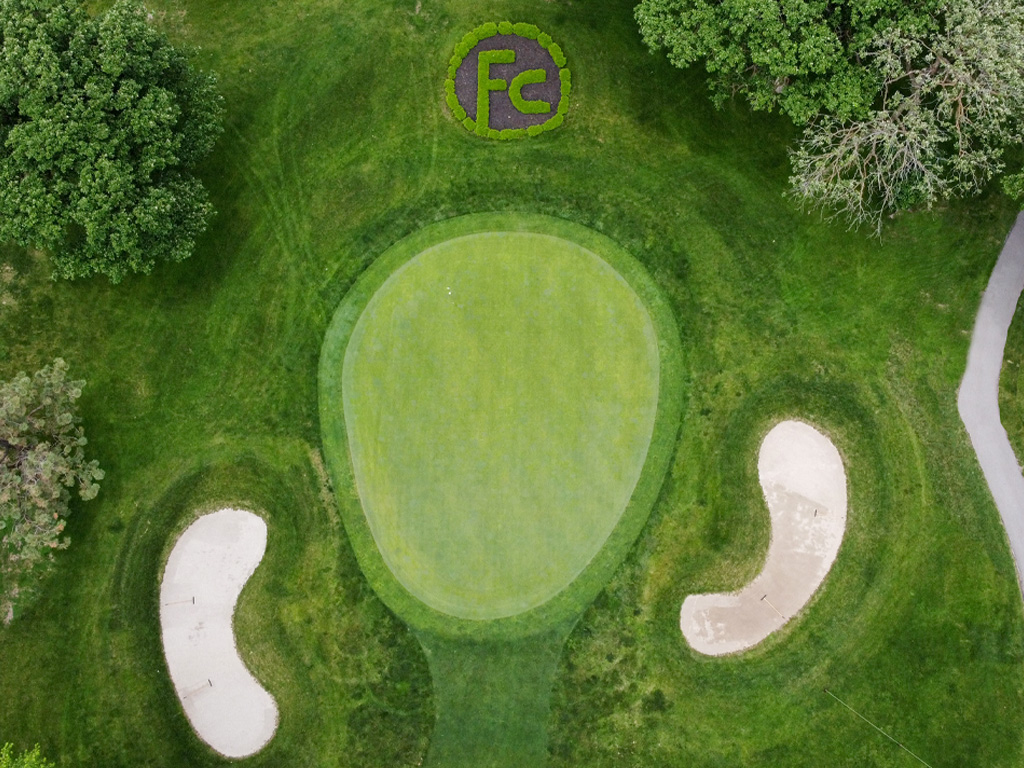
Hole #17 - The easiest hole on the course. With a short iron in hand and a big flat green, making par will be easy. A bunker on the left side of the green is the only obstacle to avoid.
Pro Play: Aim for the middle of the green and you will always have a good chance of making a birdie.
| Yardage |
Black
141 |
Par: 3 |
Green
133 |
| Men: 14 |
Handicap |
Women: 16 |
Hole #18 - Don’t let the yardage fool you, this is as tough of a finishing hole as anywhere. A 200 yard shot will leave you with a short iron into the green. Take enough club to avoid the front bunker and error to the left making sure to leave yourself below the hole as this severely sloping green has 3 or 4 putt possibilities from all angles.
Pro Play: Longer hitters can hit driver and aim for 9 green. It opens up over there and the short wedge from the left side of the green allows you to hit into a green that is sloping towards you instead of the severe Right to Left slope.
| Yardage |
Black
340 |
Par: 4 |
Green
316 |
| Men: 2 |
Handicap |
Women: 2 |
|
|
|
|
|
|